This job aid details how to look-up salary and fringe benefit information in Kuali Research (KR).
WHO:
- Department/College Administrators
- Principal Investigators
WHEN:
- Determining appropriate salary and fringe benefit rates to include in budgets.
HOW:
Create a Template Proposal
Once you go through the steps to create a template Proposal Development (PD) document you can use that PD for future inquiries on salaries and fringe benefits. Remember to write down the PD number for future use, or you can access the PD from your action list in Kuali. If you already have a template proposal you can skip to the “Looking up Salaries and Fringe Benefit Rates” section of this job aid.
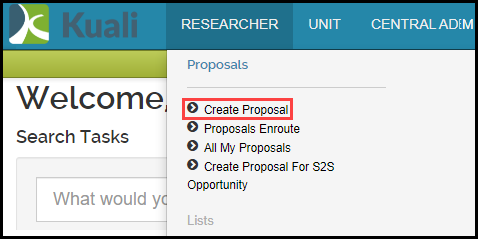
- Click Create Proposal found within the Proposals Channel under the Researcher Tab
- Before the new proposal is created, you are required to fill out certain fields, as seen in the picture below:
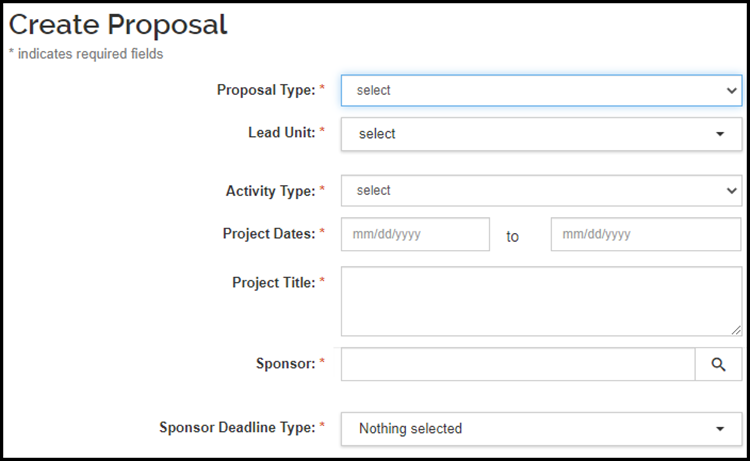
- Once you fill out all the required information, click Save and Continue at the bottom of the screen. Descriptions of some of the required fields are:
- Proposal Type – Select a Proposal Type from the dropdown list.
- Lead Unit – Select a Lead Unit from the dropdown list. If you only have access to add proposals for one unit, that unit will automatically be displayed in this field.
- Activity Type - Select an Activity Type from the dropdown list.
- Project Dates – Enter the start and end dates for the period you would like to gather salaries and fringe benefits for.
- Project Title – Add a dummy title, such as, “Laura’s template proposal”.
- Sponsor Code – You can search for a sponsor, or enter 999999, which is the To Be Named sponsor code.
- Sponsor Deadline Type – Select “No Deadline Date”.
- A Proposal Number will be assigned to the Proposal Development document

Looking up Salaries and Fringe Benefit Rates
Once you have opened/created your Proposal Development document, take the following steps:
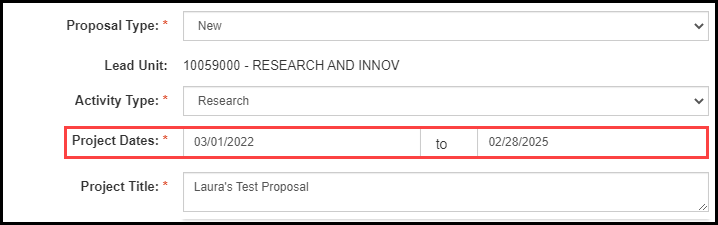
- Within the Proposal option, verify that the Project Dates are for the time period for which you would like to gather the salaries and fringe benefit rates. If not, edit the dates here. You will not be able to edit the Project Dates from within the budget.
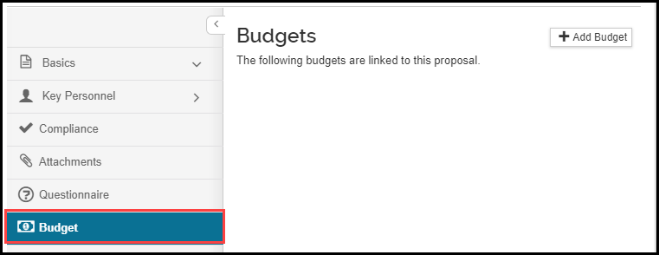
- Click on the Budget option from the menu on the left side of the screen.
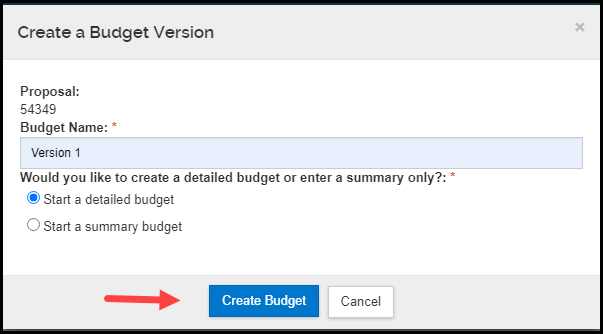
- Click the + Add Budget button in the top right. Within the pop-up window add a budget name and select the option to Start a detailed budget. Click Create Budget.
- Once created, the budget will automatically open to the Personnel Costs option.
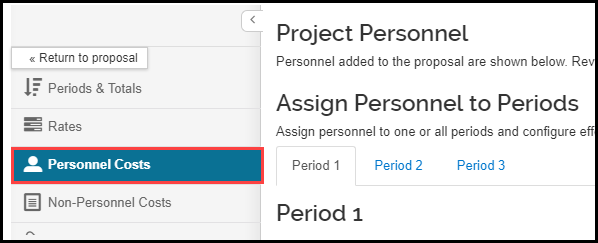
- To add named MSU employees to the budget, click the Add Personnel icon.

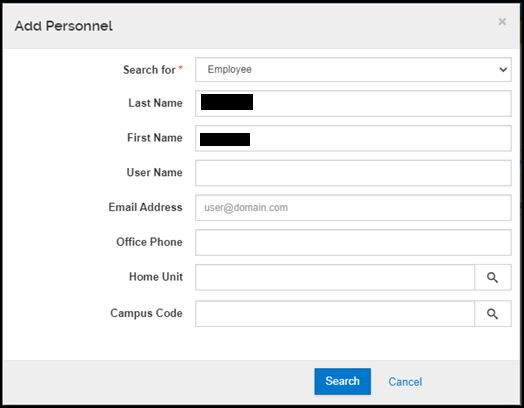
- Leave the Search for dropdown with the Employee default, enter your search criteria on the lookup screen and click search.
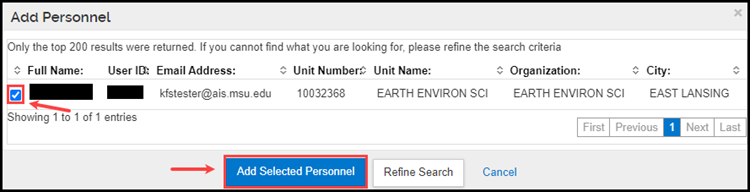
- From the search results, check the box in the column next to the person you would like to add, and click Add Selected Personnel. Follow the same steps to add additional named MSU employees.
Note: Use the asterisk symbol (*) as a wildcard to help with search results
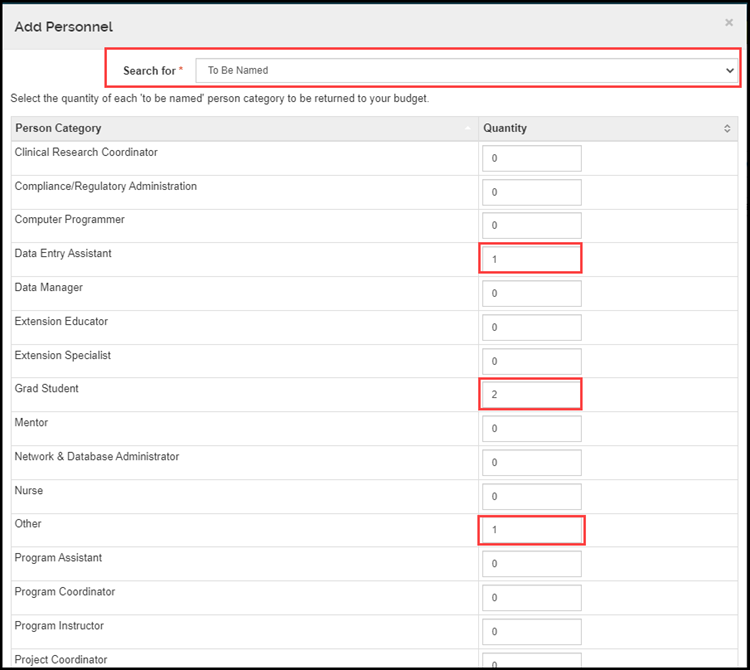
- To add a ‘to be named’ person to the budget, click the Add Personnel button. Once the pop-up box appears, change the drop down next to Search for from Employee to To Be Named. Enter the quantity of each role you would like to add next to the role(s) and click Add TBN Personnel to Budget at the bottom of the screen. Note: a value must be indicated for each role to avoid receiving an error. The system will default to 0 as the value for each role.
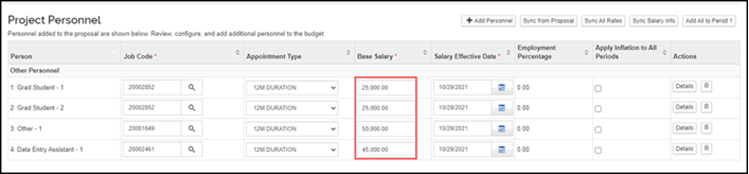
- Once you click Add TBN Personnel to Budget, you will return to the Project Personnel section. The named and TBN positions will display here.
- Employees - If the person/position is on an annual (AN) appointment, only one line will be displayed with a 12M Duration Appointment Type. If the named person is on an academic year (AY) appointment, two lines will be displayed, one with a 9M Duration and the other with a Summer Employee Appointment Type. For named persons, their current salary will display in the Base Salary field for that Appointment Type.
- To Be Named - For TBN positions enter their anticipated salary in their Base Salary fields. Do not edit the other fields in this section.
- After all personnel have been added, click the Add All to Period 1 button.
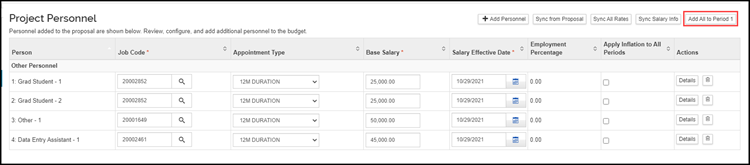
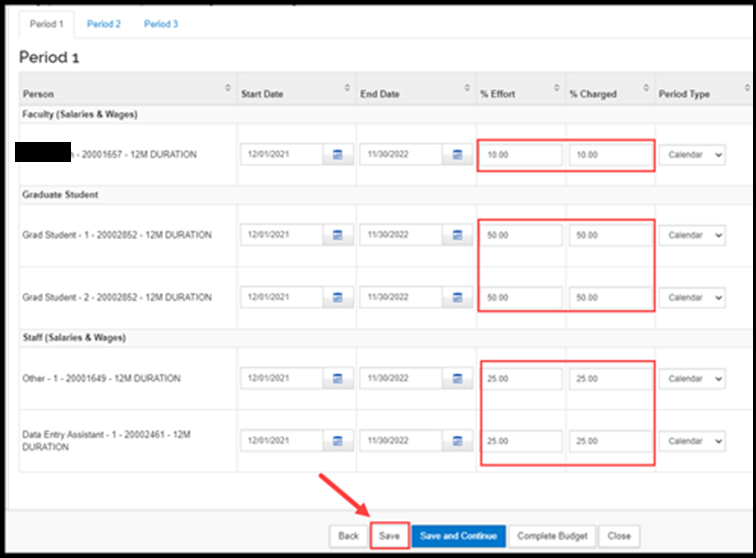
- The persons/positions will be added to separate ‘object code groupings’ based on their Job Code. In the image below you will see separate panels for Faculty (Salaries & Wages), Graduate Student, and Staff (Salaries & Wages). Next to each name/job title, enter the % Effort and % Charged. Click save at the bottom of the page to calculate the salary and fringe benefit amounts/rates.
Note: AY employees may have two separate lines to account for academic year/summer dates that are split up within the project period. Make sure to enter the % Effort and % Charged for both lines
- If you would like to calculate salary and fringe rates for outgoing years/periods, click on the Autocalculate Periods link at the top of the page.

NOTE: The system default is to inflate salaries on October 1st each year for named and TBN positions. The inflation factor for salaries and fringe benefits are based on the annual Office of Sponsored Programs Fringe Benefit Memo.
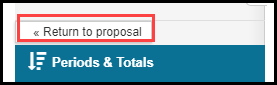
- To view and/or export salary and fringe rates for all periods, click the Return to Proposal button in the top left corner to exit the budget.
- Within the Budget option in the proposal, click the drop down in the Action column for the budget you’d like to print.
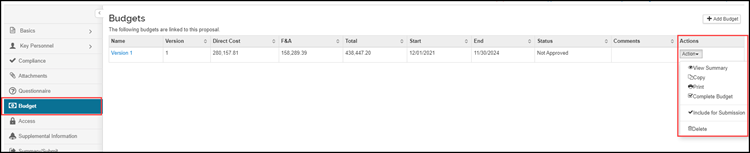
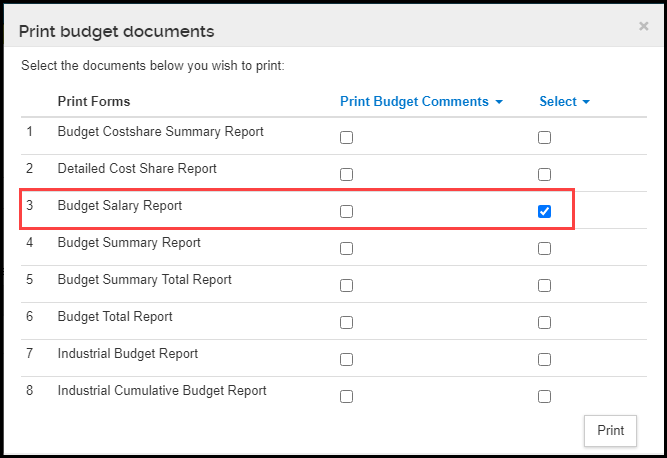
- Click on Print. In the right column of the pop-up box that appears, select the box next to Budget Salary Report, then click Print.
Sample of the Adobe report:


